DGV Nav

Showing posts with label diy. Show all posts

Thursday, September 18, 2014

DIY Acorn Vase

I'm thinking that I need a fun little DIY project to do over the weekend and this acorn vase fits the bill.  It looks simple enough and I like the natural, woodsy feel that will complement fall floral arrangements or bundles of branches.  This lovely project is by eclectically vintage.  

Make an #Acorn Vase following this simple tutorial eclecticallyvintage.com

How to make an acorn vase - follow these DIY instructions eclecticallyvintage.com

If you like this little DIY then I suggest you go check them out and see all the other ideas.  There are many.

Monday, July 14, 2014

Inspiration: Mr. Kate

Happy Monday!  (It is Monday, right?  Sometimes a teacher on vacation tends to forget trivial things like the day of the week!)  I hope you had a fantastic weekend.  Mine was spent obsessively searching for a coffee table that I need to stop obsessing over.  And buying books, and watching Harry Potter, Arrested Development, and finally finishing Dexter (boo to the ending, by the way).  The weekend also consisted of my boyfriend winning a t.v. at a golf tournament and then giving it to the Cat to put in her room.  This is not going to happen, as she is not allowed to have a t.v. in her room, but it will be finding a home in the guest bedroom, where she can access it.  That's going to be a project, to put that in there, because the shape of the room doesn't make for the easiest furniture placement.  Luckily, I have a piece of furniture in mind to set the t.v. on, thanks to staying up too late last night and binge watching all the episodes of Mr. Kate's OMG We Bought a House.

image via Mr. Kate
Originally, this was a ratty old dresser they got at a thrift store.  It needed some work, and they worked it!  I love the two- tone coloring, and the rope pulls are a cute touch.
This little project is on my list, and I'd better hurry, cause the actual cat keeps trying to make the box the t.v. is in her new bed!
Oh, and if you haven't checked out OMG We Bought a House, it is really cute and fun to watch; they're new house is amazing!


Friday, July 11, 2014

Bar Cart DIY

A couple of weeks ago, I stopped in at one of our local antique shops, where I made out like a bandit.  Among my treasures was an old bar cart.


The shelves were in pretty poor shape, but I liked the overall shape of the piece. And luckily, I had come across this post on A Thoughtful Place and this post on I Heart Organizing and I knew I wanted to use marble contact paper in some kind of project.  When I saw this cart, in my head I immediately envisioned it in gold with newly covered marble contact paper shelves. I took it home for around $30.  And when I say I took it home, I really mean I took it to my dad's garage so that he could help me.  I really wish I was little miss diy, but I will readily admit that I am not.  I am really lucky to be surrounded by a bunch of fabulously creative people, though, and they very often take pity on my lack of skills and they help me.
So my dad helped me clean this baby up.
We applied some paint stripper and let it go to work.  A lot of the black paint came off while we were applying the stripper, and for a little while my dad was convinced that the cart was actually painted over brass.  Alas, it was just brass plating, which mostly got stripped away too, but that's okay, as I had already bought some gold spray paint for the job.
As that was drying, I got to work on the shelves.  They needed to be sanded in order for the contact paper to stick to them.

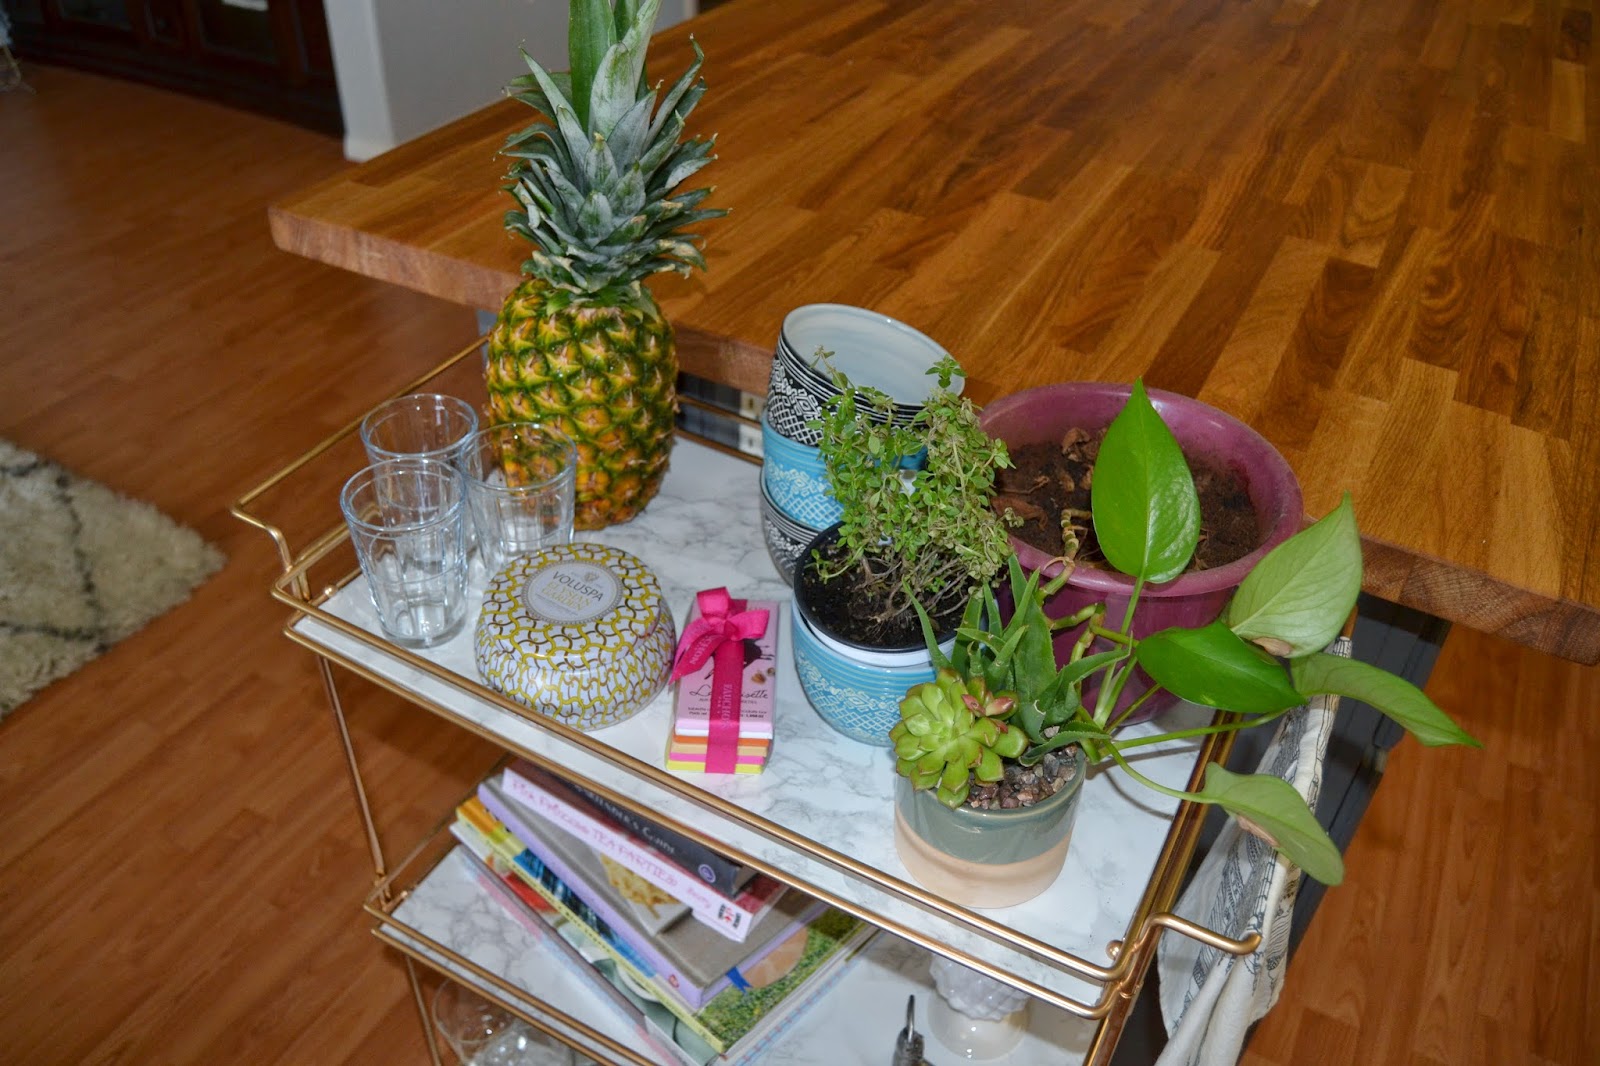
After measuring, cutting, and covering all three boards, it was time to put them on the cart.


I, for one, am pretty happy with how it turned out.  I plan on getting more plants for the top and using that shelf as an indoor herb garden.  I must admit that I already bought some other herbs for it, like basil and parsley, and then promptly killed them.  Oops.  I want to pick up some cilantro and maybe try another basil, since those are two things I know I will use.
Can you believe it's Friday already?!
Any plans for the weekend?

Monday, July 7, 2014

Anthropologie DIY

Ahhh, the wonders of spray paint.
A while back, I saw this cactus cookie jar and thought it would be a good addition to my collection of pieces for the hutch in my formal living room.  I've been on the hunt for white pieces to balance out the dark colors (navy walls, dark wood finish on the hutch).  But, alas, this was a $50 cookie jar originally, and I did not want to pay $50 (or even $28 when it went on sale).  I thought it would be a fun addition to the room, and a nice little nod to the desert we live in.
Anthropologie
(No longer available online)

Anyway, I saw it, and I thought it was cute, but then I also remembered how cheap I have become, and besides, the pants I wanted were on sale for around $50, and they were awfully cute, so...
Well, the other day the Cat and I popped in to the Salvation Army and spied this little gem.

Hideous?  Maybe.  But I thought it would be just fine with a couple of coats of white spray paint.
And you know what?  I think I was right!


One of the only differences between the original $50 cookie jar and the one I paid $2.26 for is that mine only has one flower instead of 3.  Oh well!

I know it is not exact, but for less than $3, I think it is pretty good.
I love spray paint!

Tuesday, June 24, 2014

DIY Bench Re-Upholstery

I'm thrilled at the prospect of Lori's closing in on the perfect leopard fabric for her bench project!  I figured I should start studying up on the subject of re-upholstery.  I have re-covered chair cushions before many times but I wanted to see what other people said and if there were tips I had overlooked.  I found a few helpful hints on the blogs below.  If you are also considering this sort of project, I suggest you check these out!
The Chronicles of Home: {Tutorial} How to Upholster a Bench
Little Green Notebook: How to Upholster Bench Corners
I can't wait to hear if she found the fabric on her little excursion yesterday!  I know it will be fantastic.

Sunday, June 15, 2014

Summer Theme Birthday Party

I can't believe my baby girl is now 6!  When planning this party I took into account that the wind here in the spring is crazy so I decided it had to be a morning party this time.  This decision made it obvious that a brunch was the best way to go.  Even in the morning it is really hot so Gwenna wanted to have water activities.  I suddenly knew the color scheme had to be blue and white with touches of yellow.  Very summery.  I envisioned elements like blue and white floral and Greek key, lemons, bumble bees, bubbles and sun flowers.  Somehow it all had to come together.  It wasn't a mega party with crazy amounts of things going on.  I've done that in the past but felt like keeping it simpler this time.  And I have to say, I'm really happy I did.
I the entryway, a painting created by me son greeted guests.
The cake table was my favorite part!  I found the plates and napkins first, then the fabric that I made into a table cloth next.  My mom purchased the gorgeous cake plate on ebay and I placed it on a beautiful mirrored tray.  This is all a bit sophisticated for a 6 year old so I had my mom make the cake with little bees as decoration and the bee pops were placed in an elephant planter stand. I think the bees and elephant make it more little fun and young.  


The "awning" is actually a shower curtain from Target.  I moved the dining room table under the mirror to create a buffet for foods like bagels, muffins, fruit, sandwiches, egg casserole, and doughnut holes.  I love the summery outdoor look this created!  Super fun.
For the kids, I created a little chocolate milk and lemonade center, of course.  
Last week I posted a tutorial here on these beehives for you.  I just love them.
A small candy bar made for a pretty display and the kids were able to take them home.  Also, Gwenna chose the book, "Grimm's Fairy Tales" to have her guests sign.  She wanted this book because it has a wolf on the cover and she loves wolfs right now.  Funny kid.

Matching blue pedis!
The mantel was very easy to pull together.  Just a few blue and white pieces with yellow flowers.  A glittery gold "G" with a few left over felt bees and lemons.  Perfect.  The banner reads "Gwenna" and I made it out of craft paper and ribbon.  I wish I had a detail shot, but the letters are attached to the ribbon with clothes pins.  That said summer to me.

Oh my but these kids had fun outside!  

This is such a great photo...look at little 2 year old Jackie also blowing out the candles!

Each child took home a bubble gun, cotton candy and a patch with their initial (to sew onto a beach bag, perhaps).
This was honestly one of the easiest and most enjoyable parties I have had the pleasure to create.  I loved watching my little lady and her friends have a blast.  
A special thank you to my mom for the cake and cake pops and for taking many photos for me as well as my good friend Kyungmoo Ryu for his lovely photos.  Also to my friends Kaley and Christine for the lend of items and some yummy treats.
I hope I gave you a bit of inspiration today.  So many of these ideas could be adapted to a variety of venues.  
Happy Birthday to my Gwenna!

LinkWithin

Related Posts Plugin for WordPress, Blogger...